
You’ve probably seen search results with star ratings, FAQ dropdowns, or recipe times right in the results page. That’s schema markup at work.
This guide is part of our full SEO for bloggers guide, where we briefly touched on structured data as part of technical SEO. Here, we’ll break it down step by step, in plain language.
If you’re new to blogging, schema markup for blog posts beginner can sound intimidating. It isn’t. By the end of this post, you’ll know exactly what it is, why it matters, and how to add it yourself.
What Is Schema Markup?
Schema markup is a type of code you add to your blog. It helps search engines understand your content better.
Think of it like labels on a filing cabinet. Without labels, someone has to open every folder to know what’s inside. With labels, they know instantly.
Search engines “read” your page using code and text. But they can’t always tell if a number is a price, a rating, or a date. Schema markup removes that guesswork.
A Simple Example
Say you write a recipe post. Without schema, Google sees a wall of text. With schema, Google knows:
- This is a recipe
- It takes 30 minutes to make
- It serves 4 people
- It has a 4.5-star rating
That extra clarity can earn your post a richer, more eye-catching search result.
Why Schema Markup Matters for Bloggers
Schema markup isn’t a mysterious technical trick reserved for developers. It’s a practical tool that helps your content stand out.
It Can Boost Your Click-Through Rate
Search results with schema often show extra details, like star ratings, FAQ dropdowns, or article dates. These are called rich results or rich snippets.
Rich results take up more space and catch the eye faster than plain blue links. More visibility usually means more clicks, even if your ranking position stays the same.
It Helps Search Engines Understand Context
Google doesn’t just want to know what words are on your page. It wants to know what those words mean. Schema markup adds that context directly.
This matters more as search engines rely on AI to interpret content. Clear, structured data makes it easier for both traditional search and AI tools to summarize and reference your posts accurately.
It Supports Voice Search and AI Overviews
Voice assistants and AI-generated answers often pull from structured, well-organized content. Schema markup increases the odds your post gets picked as a source.
Common Types of Schema Markup for Blog Posts
You don’t need every schema type. Focus on the ones that fit your content.
-
Article Schema
This is the most basic and widely used schema for blog posts. It tells search engines:
- The headline of your post
- The author’s name
- The publish and update dates
- The featured image
Nearly every blog post should have Article schema, regardless of topic.
-
FAQ Schema
If your post includes a frequently asked questions section, FAQ schema can display those questions directly in search results as expandable dropdowns.
This is one of the easiest ways to make your listing take up more visual space. It’s especially useful for informational and how-to content.
-
HowTo Schema
Perfect for step-by-step tutorials. HowTo schema can display numbered steps directly in search results, sometimes with images for each step.
If you write “how to” content often, this schema type is worth prioritizing.
-
Recipe Schema
If you run a food blog, Recipe schema shows cook time, ingredients, calories, and ratings right in the search results. It’s one of the most visually rich schema types available.
-
Review Schema
Use this if you write product reviews. It can display star ratings next to your listing, which often improves click-through rates significantly.
-
BreadcrumbList Schema
This shows the page hierarchy in search results, like “Home > Blog > SEO.” It helps users understand where a page sits within your site before they even click.
How Schema Markup Actually Works
Schema markup uses a shared vocabulary called schema.org. This is a standard that Google, Bing, and other search engines agreed to support together.
The code itself is usually written in a format called JSON-LD. It sits in your page’s code, but it doesn’t appear anywhere visually. Readers never see it. Only search engines read it.
Here’s a simplified example of what Article schema looks like:
{
“@context”: “https://schema.org”,
“@type”: “Article”,
“headline”: “Schema Markup for Bloggers”,
“author”: “Your Name”,
“datePublished”: “2026-07-28”
}
You don’t need to memorize this. Most bloggers never write schema code by hand. Tools and plugins handle it for you, which we’ll cover next.
How to Add Schema Markup to Your Blog
You have three main options, depending on your comfort level and platform.
Option 1: Use an SEO Plugin (Easiest)
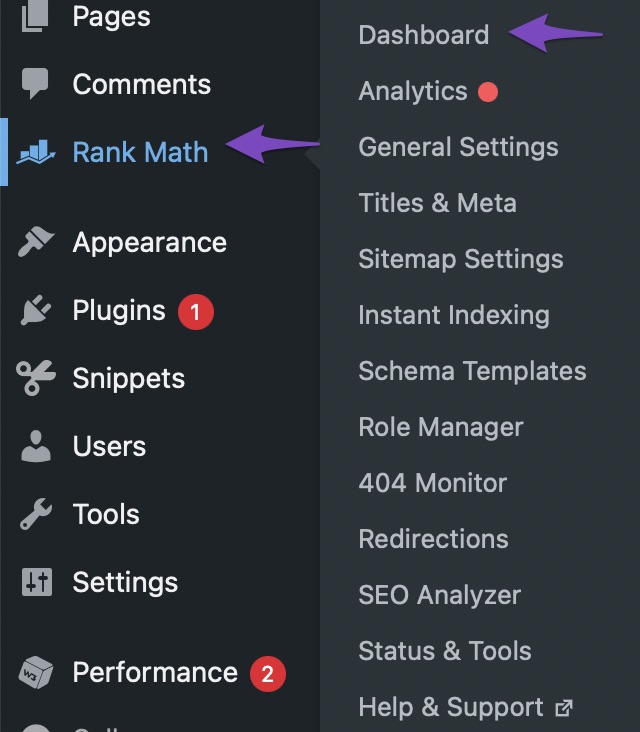
If you use WordPress, this is by far the simplest route. Plugins like Rank Math and Yoast SEO add schema automatically.
Steps using Rank Math:
- Install and activate Rank Math
- Open any blog post in the editor
- Scroll to the Rank Math meta box below your content
- Click the “Schema” tab
- Choose a schema type (Article, FAQ, HowTo, etc.)
- Fill in the requested fields
- Update or publish your post
Steps using Yoast SEO:
- Install and activate Yoast SEO
- Open your post editor
- Find the Yoast SEO section
- Go to the “Schema” tab
- Select your page type and article type
- Save your changes
Both plugins apply basic Article schema automatically, even if you don’t touch the settings. Adding FAQ or HowTo schema usually takes a few extra clicks.
Option 2: Use a Schema Generator Tool
If you don’t use WordPress, free online generators can create the code for you.
- Google’s Structured Data Markup Helper — walks you through tagging content on your actual page
- Merkle’s Schema Markup Generator — simple form-based tool for common schema types
- TechnicalSEO.com Schema Generator — good for FAQ and HowTo schema specifically
The process is similar across tools:
- Choose your schema type
- Fill in the form fields (title, author, date, etc.)
- Copy the generated code
- Paste it into your page’s HTML, ideally in the <head> section
Option 3: Add Code Manually
If you’re comfortable editing your theme files, you can paste JSON-LD code directly into your site’s header or a specific post template. This gives you full control but carries more risk of errors if you’re not familiar with code.
For most beginner bloggers, a plugin is the safer and faster choice.
Schema Markup Formats: JSON-LD vs Microdata vs RDFa
You might come across different schema formats while researching this topic. Knowing the difference helps you understand what tools and plugins are actually doing.
JSON-LD
This is the format Google recommends and the one most plugins use. It lives as a separate block of code, usually in your page’s header. It doesn’t touch your visible HTML at all, which makes it easy to add and remove without breaking your design.
Microdata
Microdata gets added directly inside your existing HTML tags, mixed in with your content. It works, but it’s harder to manage since it requires editing your actual page structure.
RDFa
RDFa is similar to microdata but uses different attributes. It’s less common for blogs and shows up more often in academic or publishing platforms.
Which One Should You Use?
Stick with JSON-LD. It’s cleaner, easier to maintain, and it’s what Google explicitly recommends for most sites. Every plugin mentioned earlier in this guide uses JSON-LD by default, so you likely won’t need to choose manually.
How to Maintain Schema Markup Over Time
Adding schema once isn’t the end of the job. Like the rest of your SEO, it needs occasional upkeep.
- Update dates automatically — most plugins update the “modified” date when you edit a post, so double-check this setting is turned on
- Recheck old posts — if you switch plugins or themes, older schema can sometimes break or disappear
- Re-test after major site changes — redesigns, migrations, or plugin updates can all affect how schema renders
- Monitor Google Search Console — its “Enhancements” section flags schema errors across your whole site, not just one page
Set a reminder every few months to spot-check a handful of posts with the Rich Results Test. It only takes a few minutes and catches problems early.
Testing Your Schema Markup
After adding schema, always check that it works correctly. A small typo can break the whole thing.
Google’s Rich Results Test
This free tool checks whether your page is eligible for rich results.
- Go to Google’s Rich Results Test tool
- Enter your blog post’s URL
- Review the results for errors or warnings
- Fix any issues the tool flags
Schema Markup Validator
This tool, run by Schema.org itself, checks your code against the official schema.org standards. It’s useful for catching structural errors the Rich Results Test might not flag.
Run both tools after any major schema changes. Search engines can take time to reflect updates, so don’t panic if rich results don’t appear immediately.
Common Schema Markup Mistakes to Avoid
Even simple mistakes can prevent your schema from working properly.
- Marking up content that isn’t visible on the page — Google’s guidelines require your schema to match what readers actually see
- Using the wrong schema type — don’t tag a blog post as a Product if it’s not selling anything
- Missing required fields — each schema type has fields Google requires, like author or date
- Duplicate schema on one page — multiple conflicting schema blocks confuse search engines
- Copying schema code without updating the details — always personalize generated code with your actual content
Rich results are also never guaranteed. Adding valid schema improves your chances, but Google decides whether to display them.
Schema Markup and the Bigger SEO Picture
Schema markup is one piece of a much larger technical SEO puzzle. It works best alongside solid on-page SEO, clean URLs, and fast page speed.
Think of it as a finishing touch. It won’t fix thin content or bad keyword targeting. But once your fundamentals are solid, schema markup helps your content get noticed and understood more easily.
For a full breakdown of technical SEO fundamentals, from sitemaps to broken links, check out our complete SEO for bloggers guide.
Final Thoughts
Schema markup might sound technical, but it’s one of the more beginner-friendly parts of SEO. A plugin does most of the heavy lifting for you.
Start with Article schema on your existing posts. Add FAQ or HowTo schema where it fits naturally. Test everything, and let the rich results build over time.
It won’t transform your blog overnight, but it’s a small, low-effort step that adds up. Combined with strong content and solid on-page SEO, schema markup helps search engines showcase your work exactly the way it deserves.
Frequently Asked Questions
Do I need schema markup for every blog post?
Not strictly, but Article schema is worth adding to every post. Most SEO plugins add it automatically, so there’s little reason to skip it.
Will schema markup guarantee a higher ranking?
No. Schema doesn’t directly boost rankings. It improves how your content displays and can increase clicks, which indirectly helps your SEO.
Is schema markup hard to learn for beginners?
Not with the right tools. Plugins like Rank Math and Yoast handle most of the technical work, so you rarely need to write code yourself.
Which schema type should beginners start with?
Start with Article schema, since it applies to nearly every post. Add FAQ schema next if your posts include question sections.
How long does it take for rich results to appear?
It varies. Some sites see changes within days, others take several weeks. Google needs to recrawl and reprocess your pages first.